Save Money with These Easy Steps for Professional-Looking Carpet Patch Repairs
Carpet damage can be frustrating, but replacing an entire carpet can be costly. Luckily, carpet patch repair offers a budget-friendly solution to fix small damaged areas with professional-looking results. This step-by-step guide will walk you through the process of repairing your carpet patch so you can save money and extend the life of your flooring.
Assessing the Damage and Gathering Materials
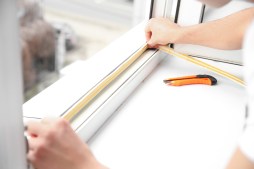
Before starting your carpet patch repair, carefully examine the damaged area to determine if a patch is feasible. Small tears, burns, or stains are ideal candidates for patching. You’ll need some essential materials: a piece of matching carpet (often leftover from installation), a utility knife, carpet adhesive or double-sided tape, a putty knife, seam roller, ruler or measuring tape, and scissors.
Cutting Out the Damaged Section
Using your utility knife and ruler for precision, cut out the damaged section in a neat square or rectangle shape. Make sure to remove any frayed edges to create clean lines. This will help ensure the new patch fits perfectly into place without gaps or unevenness.
Preparing and Cutting the Replacement Patch
Place your spare carpet piece on a flat surface with its backing side up. Using your cut-out damaged piece as a template, trace its exact shape onto the spare material with chalk or a marker on the backing side. Cut out this replacement patch carefully using sharp scissors or a utility knife to make sure it matches exactly.
Securing The Patch in Place
Apply carpet adhesive or double-sided carpet tape evenly along the floor where you removed the damaged section. Fit your replacement patch snugly into place so that it aligns perfectly with surrounding fibers. Press down firmly and use a seam roller to blend edges seamlessly into existing carpeting for that professional look.
Finishing Touches and Maintenance Tips
Once installed, trim any excess fibers that may stick up unevenly around the edges using scissors. Vacuum gently over repaired area after adhesive dries completely to blend texture further. To maintain your repair’s longevity avoid heavy furniture placement directly on patched spots initially and clean spills promptly.
With these simple steps for carpet patch repair, you can confidently tackle minor damages yourself without spending on costly replacements. Not only will this save money but also help keep your home looking fresh longer by restoring worn spots quickly and effectively.
This text was generated using a large language model, and select text has been reviewed and moderated for purposes such as readability.