The Best Tools and Materials for Repairing Cracks in Plaster Walls
Cracks in plaster walls can be both unsightly and concerning, but with the right tools and materials, repairing them is a manageable DIY task. Whether the cracks are minor hairline fractures or more significant splits, understanding what to use and how to approach the repair will help restore your wall’s smooth finish effectively.
Identifying the Type of Crack
Before starting any repair, it’s important to identify the nature of the cracks on your plaster walls. Hairline cracks are often caused by settling or minor temperature changes, while wider cracks might hint at structural issues. Properly diagnosing the crack type will determine which tools and materials you need for a lasting fix.
Essential Tools for Plaster Wall Repairs
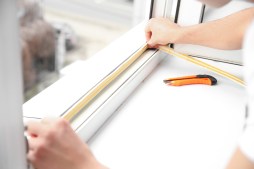
Having the right tools makes all the difference. Common essentials include a putty knife or plastering trowel for applying filler smoothly, a utility knife or scraper to clean out loose material from cracks, sandpaper for smoothing patched areas, and a mixing container if you’re preparing your own plaster compound. A dust mask and safety goggles are also recommended for protection during sanding or scraping.
Choosing the Right Materials
For repairing cracks in plaster walls, several materials can be used depending on crack size. For small hairline cracks, acrylic-based fillers or pre-mixed spackling compounds work well because they’re easy to apply and sand down smoothly. Larger or deeper cracks may require setting-type compounds like joint compound or patching plaster that harden more firmly. In some cases, reinforcing mesh tape can provide extra stability over wider gaps before applying filler.
Step-by-Step Repair Process
Start by cleaning out any loose debris from the crack with a utility knife or scraper. Next, if using mesh tape on wider gaps, apply it carefully across the crack to prevent future cracking. Then use your putty knife to apply an even layer of filler over and slightly beyond the crack edges. Allow it to dry completely according to product instructions before sanding down until flush with surrounding wall surface. Repeat filling and sanding as needed until smooth.
Finishing Touches for a Seamless Look
Once repaired areas are smooth and dust-free, prime them with a suitable primer designed for drywall or plaster surfaces before painting. This ensures proper paint adhesion and color consistency across patched spots versus surrounding wall sections. With patience using these tools and materials correctly, you’ll have your cracked plaster walls looking flawless again in no time.
Repairing cracks in plaster walls doesn’t have to be daunting when equipped with appropriate tools like putty knives and sandpaper along with quality fillers suited for different crack types. By following proper preparation steps through finishing touches such as priming and painting after repairs dry thoroughly; anyone can achieve professional-looking results that extend their walls’ lifespan beautifully.
This text was generated using a large language model, and select text has been reviewed and moderated for purposes such as readability.


