A Step-by-Step Guide to Installing a Smart Thermostat at Home
Installing a smart thermostat can transform your home’s heating and cooling system, making it more efficient and easier to control. If you’re considering upgrading to this modern technology, it’s helpful to know what to expect during the installation process. This guide will walk you through each step so you can feel confident about enhancing your home’s comfort and energy savings.
Understanding Your Smart Thermostat
Before installation, it’s important to familiarize yourself with the smart thermostat’s features and compatibility. Most smart thermostats work with common heating and cooling systems but checking your system’s compatibility ensures a smooth setup. These devices often connect via Wi-Fi, allowing remote temperature control through smartphone apps or voice assistants.
Gathering Necessary Tools and Materials
To install your smart thermostat, you’ll typically need a screwdriver, a drill (if new holes are required), wire labels or tape, and sometimes a voltage tester for safety. Your thermostat package usually includes detailed instructions along with mounting hardware. Preparing all tools beforehand helps the process go smoothly.
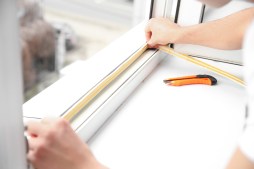
Turning Off Power and Removing the Old Thermostat
Safety is crucial; start by turning off power to your HVAC system at the circuit breaker to prevent electrical hazards. Then carefully remove your existing thermostat’s cover and disconnect the wires one by one, labeling them as you go so that reconnecting is straightforward.
Wiring and Mounting Your New Smart Thermostat
Following the manufacturer’s wiring diagram, connect each wire from your HVAC system to its corresponding terminal on the new thermostat base. Securely mount the base on the wall using screws or adhesive strips provided. Once mounted, attach the main unit onto its base according to instructions.
Configuring Settings and Connecting to Wi-Fi
After powering back on, you’ll be guided through an initial setup on the device screen or companion app. This involves connecting your thermostat to home Wi-Fi network, setting temperature preferences, scheduling heating/cooling cycles if desired, and integrating voice assistant controls if supported.
Installing a smart thermostat is an accessible DIY project that enhances comfort while reducing energy costs over time. By following these steps carefully—from preparation through configuration—you’ll enjoy smarter climate control tailored perfectly for your home.
This text was generated using a large language model, and select text has been reviewed and moderated for purposes such as readability.